Be a smartie… book a party

thank you stampin up cards

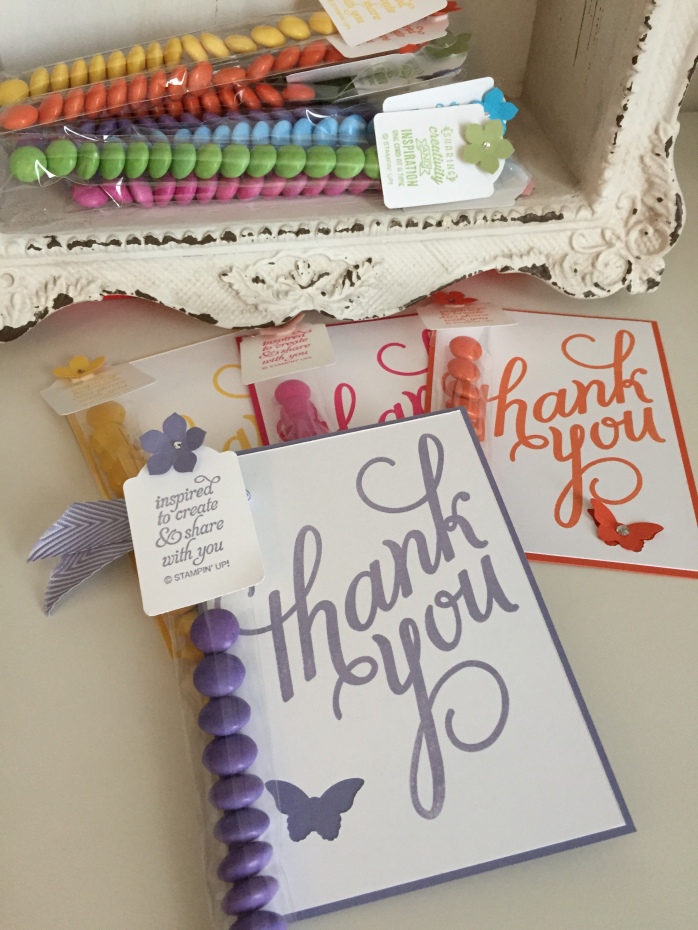
I just love the big thank you stamp from Another Thank you.  And I love that Stampin’ Up produce such great coordinating colours of cards, ribbons, inks and embellishments, but most of all I LOVE THAT SMARTIES are the same colours.

I stamped the big Thank you Stamp on to whisper white cardstock cut at 10cm x 14.5 cm in the colour of the smarties, Wisteria Wonder in this case to match the lilac coloured smarties.  I then punched out a little butterfly using my punch and mounted it on a layer of Wisteria Wonder cardstock cut to 10.5 cm x 15cm.  The little tag is stamped with an image from Better than Email stamp set (which sadly isnt available in the UK, but a lovely demonstrator friend in the US gave me as a gift when I was in Orlando last month).  Then I added 15 smarties (maybe with one or two making it to my mouth) to the cute cellophane bags we have which are just 1 inch (2.5cm) wide by 8cm long and a perfect fit.  Such good value too – you get 50 of them for just £2.25.  A little petite punched out flower, a bit of ribbon, and these thank you cards are just ready to go.  If you would like to buy some just click on the link below

button

So who am I giving such lovely thank you cards to?  Well my customers that’s who.  i do like to treat them with the odd little something chocolatey to say thank you for their business.  These are for a party I had on Friday night with the lovely Claire and her friends.  Claire was very happy with her night, and earned loads of hostess benefits for herself, and has now been able to get everything she wanted from her wish list.  I have some free dates in March – and with an extra incentive of saleabration and free products for anyone spending £45 what better time to do it.

And if you would like to become a stampin’ up demonstrator we have another amazing deal on at the moment.  Pay £99 and get £130 worth of product of your choice for your starter kit, and two free gifts from the saleabration catalogue!

Hope to see you on my blog again soon.

Caroline x
Clearance Rack has been Re-STOCKED

Bargagin

There are bargains galore in the newly re-stocked Clearance Rack – go check it out! click the link here 

Time to grab yourself a quick bargain, or perhaps a present for a crafty friend – delivery is flat rate to your home for £4.95 regardless of what you order…with some items with 80% off.

Happy Christmas!

IMG_0150-1.JPG

It’s A CraftyHallett Stampin’ Up Christmas Week – Day 1

Follow my blog with Bloglovin

Every day this week I will be blogging a Christmas Card, packaging, gift or decoration idea.  So lets stop waffling and start with today’s project. 2014-11-30 12.14.05 This is a snowflake sparkle card.  The card, using only one Stampin’ Up! Colour – Island Indigo, has been cut using the Snowflake Card Thinlets Die and stamped with images from the LetterPress Winter Stamp Set and a sentiment from the Good Greetings set.  A couple of snowflakes are cut from Silver Glimmer Paper and a little DSP is from the All Is Calm Speciality Paper Set. There is a video from Stampin’ Up here which shows you how to use the die and to use the die to cut the snowflakes http://youtu.be/feQESSKQnfw Everything you need to create this card is listed below – click on the pictures to be taken automagically to my shop so you can check them out for yourself.  Hope you have a great week and please pop back tomorrow for another project. PS. Big Reminder:-  You only have one more day to take advantage of the great starter kit offer – pay £74.25 and get £130 worth of product – a fantastic christmas present to you from Stampin’ Up!  Click here for more details 

Boys Birthday Card from Crafty Hallett

Just a quick post to share with you a card I made last week for my Son’s 24th Birthday.

2014-11-12 22.19.28

I used a number of stamp sets for the card.  Starburst Sayings for the “Happy Day” and “You make the World a Better Place”, Sassy Salutations for the Happy Birthday Sentiment and the Larger Than Life Alphabet stamps to do the Number 24.

2014-11-12 22.18.082014-11-12 22.18.30 2014-11-12 22.18.15

The background paper is from the lightweight “Typeset” stack and I used the Stars Mask to sponge stars in Lost Lagoon ink to tie in with the ribbon on the card.  A little twine and a mini staple and I was done.

All the items used to make this card are available from my shop – clicky click the pictures below to be taken automagically to my shop.

Stampin’ Up! Uk Festival of Trees video and a few quick tips

So a quick video today to show you this card

IMG_0014.PNG

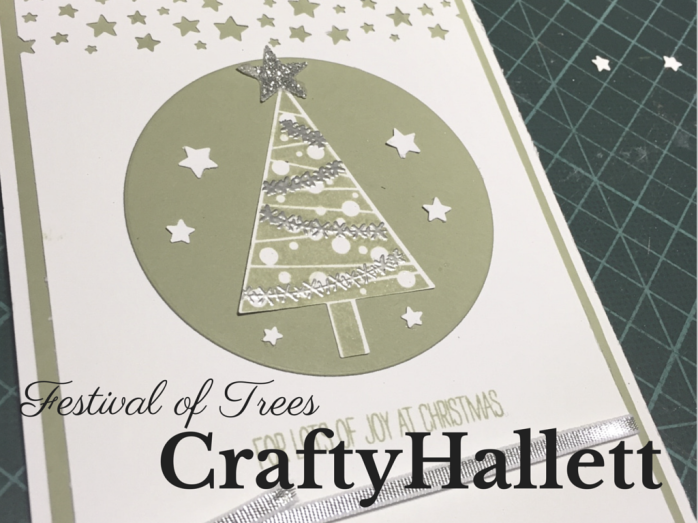
It was a quick and easy one using the Festival of Trees bundle of punch and stamps which is available in my shop order number 137640 for £24.95 for the 13 stamps and punch too – great value for money,

The card stock is whisper white and pear pizzaz and the stars confetti punch is also in the shop – click on the link to the right to go shopping

Anyway enough waffling – here’s the video link

Enjoy your day , it’s too wet and cold here to go out so I am staying in my craft room with the cat 😉

CraftyHallett Reward Day!

Oh its my favourite day of the year – craftyhallett reward day.  Save your diaries, for ….. Saturday 24th January from 10am until 4pm  – a whole day of crafting with friends.

Crafty Reward Day  this year is at  St George’s Church Hall, 8 Audley Road, Folkestone CT20 3QA.

This event was such fun last year – a whole day with friends, old and new.  Crafting, chatting and mainly laughing.  So why not do it again!

You will get to make 5 different projects with 5 different Stampin’ Up! Demos.  Lorraine, Sandra, Sally, Sharon and I have each prepared something fun to share with you, all you need to bring is yourself, a packed lunch and some cash for a raffle as you might win an awesome prize or two. And did I mention table gifts and spot prizes?

Here’s a few photos from last year to whet your appetite


The day is free to customers who spend a total of £50 or more in November & December.  If you are not a customer of mine and would like to attend the cost will be £20.   Do hope to see you there.

PLEASE RSVP by EMAIL TO MRSCAROLINEHALLETT@GMAIL.COM or TEXT/CALL  07545 968127 NOT LATER THAN 19th JANUARY TO SECURE YOUR SPACE AND ENSURE WE CATER FOR THE RIGHT NUMBERS THANK YOU


Advent Calendar Part 2 – Using Stampin’ Up UK’s 25 Days Set

Hope you like yesterdays advent calendar?  Just 21 days until we start counting down to the big man’s arrival.

Todays advent calendar is a little present for my head office colleagues – something for everyone to enjoy – one box at a time, filled with a little chocolate loveliness – so here are days 1-5 – a little cube, a shopping bag, a milk style pouch, another bag, and a triangle

IMG_0616

Next up we have days 6-10 -some more of those pouches, and two crackers made on the Envelope Punch board

IMG_0621

For days 11-15 I used the petite handbag die, the curvy keep sake die and one of the stars from the Many Merry Stars kit 🙂

IMG_0623

Days 16-20 are meant to look like shopping bags and boxes, as that time of the year approaches

IMG_0626

And finally the last five

IMG_0630

Just had to make number 25 glittering gold glimmer paper.

I have put some pictures of the products used below if you want to get some from my shop, but WARNING, I used everything I could find on this set…

Wedding Card & Gift Box using Project Life Kit from Stampin’ Up! UK

2014-10-26 09.46.43

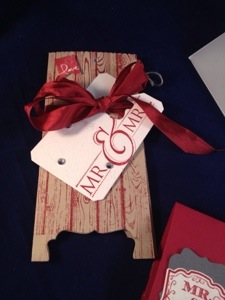
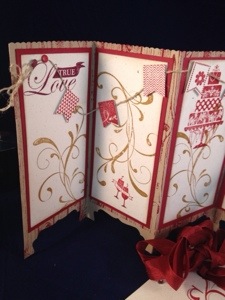
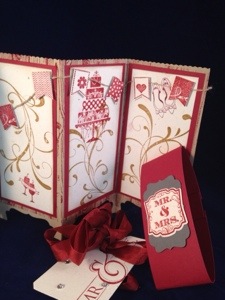
Today I am sharing with you a card and envelope I made for my friend’s wedding.  Their colour theme was deepest purple so I was able to use as a colour match Rich Razzleberry.  I used the cards from the Love Story Project Life Kit to create a bunting string with pictures of the happy couple, a shaker heart with star confetti and an envelope containing the gift (cash) we had for them.  I have shared some photographs below so you can see each part of it.

2014-10-25 10.56.30 2014-10-25 10.56.01 2014-10-25 10.55.50 2014-10-25 10.55.37 2014-10-25 10.55.19 2014-10-25 10.55.05

The project life cards are perfect for this project – and a few stamps from Big News and other sets completed the look!

I hope the bride and groom liked it.  We had a lovely day with them.  Here’s me and the man getting in the mood ourselves

2014-10-25 12.42.15

Hope you have all had a great weekend.  Click on the pictures below of the products I used in this card to be taken automagically to the shop if there’s anything there that takes your fancy.

Have a great week!

Caroline xxx

Stampin’ Up! UK’s Many Merry Stars Kit – opening the bag

Merry and Bright

So when Pam Morgan demonstrated these kits at convention and I saw the size of the big star I just knew I needed this kit!  And what’s more I knew I wanted to make them with my crafty gals.

Its been a long week waiting for Mr UPS to deliver them, so when I got in from work this evening I couldn’t wait to get started.  I thought I would video this occasion so you could share the excitement with me!  Have you got your kit yet – at £23.99 they are great value and you get a LOT.

Video is here

you will have to excuse the bloopers, I was learning as I went along, and as we are off at a fabulous wedding all day tomorrow I could not wait for better light – so its not ideal but its there 🙂

Just got 25 more stars to go – which is perfect for an Advent calendar so I shall be filing mine with treats for each day leading up to the BIG star for the final day.

If you want one of these for yourself then please visit my webshop – and hurry as these are only available whilst stocks last – and they are very popular already, why not get a couple they make great presents for keeping the kids busy in the run up to Christmas – as another idea perhaps make them with the kids pictures or wishes inside, seal them up and then use them as decorations for the next few years – then when the kids are grown up open the stars and read what their 5/6/10 year old selves were excited about!  Or if you do craft fairs buy some to sell

Hope you all have a lovely weekend.   Oh and 1 week on I still havent come out of my SU Convention bubble… and I am planning my next one 🙂

A Bright and Beautiful Joyous Wreath

Hi there

Missed me? We have just come back from a lovely holiday in sunny Malta, had a fabulous time and loved the people, the island and everything about our time away.

Now that I have completed the mountain of washing that always seems to accompany a holiday I was able to spend a little time in the craft room creating my project for the class we are doing on the 6th September.

As its a beginners class I decided to go for something that looks very complicated but is actually easier for new stampers and crafters to do.

Joyous Wreath

Hit me with your Stampin’ Up! Big Shot Baby!

Flyer details for the Big Shot

We all love a deal!  And this one is a great bargain – Order a big shot and choose one of these stamps and bundle sets for FREE!  WOOOO thats a saving of up to £47.50 depending upon which stamp set and die you go for.

So if you have been thinking of adding a big shot to your collection, Stampin up has just hit you with its Best Shot and what a deal it is….

Click on the link below to be taken automagically to the shop to buy your bargain today.

Do not despair if you already have a big shot and just want the stamps and dies.  They have been prepared as a bundle, and one of them is a sneaky first peek from the Christmas Catalogue – and will be very popular – those stars are lovely.  You can buy them together with the dies and save yourself 15% – wish I had waited to buy the star dies!


button

Perfect Peacock from Blendabilities and Stampin’ Up UK!

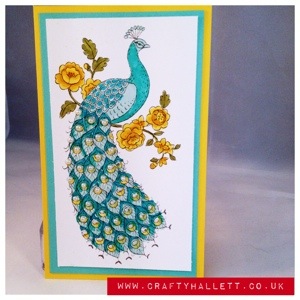
Just a quick post from me today to show you this lovely stamp which really speaks for itself – its a great big peacock that’s perfect for colouring in with, with the new blend abilities pens 🙂

It’s only available in wood mount – but at £13.95 for such a large stamp it’s great fun – I loved sticking on all the little pearls too

20140710-161224-58344920.jpg


button

You can buy this in the shop here


And if you would like to know more about the blendablities – then click click the picture on my side bar


Something For Baby from Stampin’ Up! UK meets Chest of Drawers Step Card

Have you seen the new “Something for Baby Set” from Stampin’ Up! its so SWEET – and really lends itself to this stepper card.

I have done a video and have also photographed the template page to make measurements easier for people

2014-07-06 16.28.43

2014-07-06 16.27.54

As you can see you start with a piece of card 8.5 inches by 5.5 inches and then cut and score where indicated on my template above.

The video for this is here


2014-07-04 19.45.21

Here is is in the Blue Colourway – this one was a giveaway on my facebook page and is already winging its way to a lovely lady who has just given birth to a beautiful baby boy. Hope they like it.

Lots of Love

Caroline xxx

button

If you would like to buy any of the stamp sets used to make this card please click on the pictures below

Grab a bargain from Stampin’ Up! UK Shop Weekly Deals

This weeks special deals are up and I spy a really good find… the angled Tag Topper Punch has been reduced to just £15.71 whooo hoo – grab it this week before it disappears – you can go shopping here 

Angled Tag Topper Punch

Blendabilities are HERE from Stampin’ Up! UK

Today is a very exciting day in the Stampin’ Up! world – the new Annual Catalogue goes live and with that the launch of the Blend-abilities Alcohol markers.

Here is a card I made using ALL NEW supplies from the book

Image


They are a dream to colour with.


What Sets Them Apart:

  • The Stampin’ Up! rectangular barrel keeps your markers from rolling away!
  • Flat storage helps to maintain the life of each marker.
  • Each marker comes with a tip on each end: brush and fine.
  • Marker tips are made of nylon, which is superior to polyester which can fray.
  • Colour coded caps.
  • Stampin’ Up! markers coordinate wonderfully with our cardstock, and can be used with transparent sheets

Here is a video that shows you how they work

And details how to order are on the attached flyer

CLICK HERE TO BUY IN THE SHOP

demomain_catalog_demo_7.1.2104-7.31.2014_SP_UK

flyer_blendabilities_demo_7.1.2014_UK

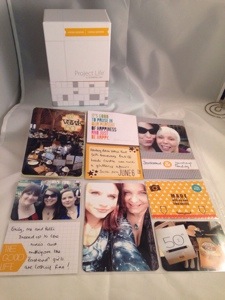
Project Life is here !!! PLXSU

Oh look Project Life has arrived – this starter kit is just lovely

20140610-063733-23853605.jpg

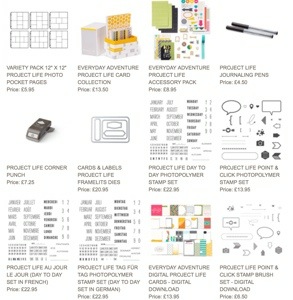
Just go to the shop (click the catalogue page to the right) and type in project life into the search box and you can easily buy all the lovely new things

Here’s a picture of my first PL layout with the new SU items

20140610-064006-24006605.jpg

Have a great day
Caroline xxx

Project Life – A Sneaky Peek inside my Pre-order

Oh its so exciting – all over the UK stampin up demos have been getting their pre-orders’ delivered.  In previous years we were not allowed to share these with you – or only finished products – but now we are allowed to share with you the exciting new things that are coming.

So to kick us all off – Project Life – SUxPL tie in – here’s a quick video look at all the yummy things you will be able to buy from 10th June


If you are interested in getting some of these items then please fill in the form and I will add your items to my order going in next week and you will be one of the first to get your hands on it.  Cant wait – then join up to Stampin up today for just £50 and these items can be in your starter kit!


Join Stampin Up and be the first to get your hands on new goodies

Ever thought of being a stampin up demo? For the next month, new recruits have a choice – you can buy the traditional Starter Kit priced at £99 (and get £130 product value), or for a limited time, a reduced priced Starter Kit at the low price of £50 (£55 product value.)

This offer is only good until June 30, so take advantage while you can!

This is a fantastic time to join Stampin’ Up! As a demonstrator, you can get a discount on new products like Blendabilities and Project Life, and you will be able to get in on the preorder for the brand new autumn/winter catalogue. As from 30. May 2014, new recruits will be able to include pre-order items in their Starter Kit.

Message or call me for more details 🙂

20140528-001810-1090463.jpg

Magic Slider Cards

Hi all

I saw one of these magic slider cards on a facebook group and knew I wanted to make one of my own.  Unfortunately the picture didnt have a tutorial or measurements with it, so I did a bit of googling and found something similar, and then ended up making my own up anyway!

Magic


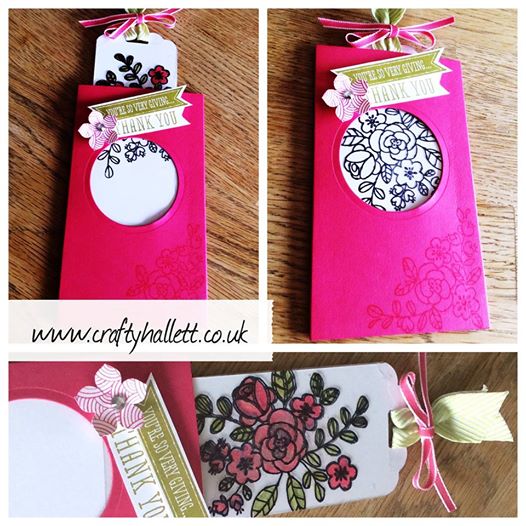
The card base used is Melon Mambo – cut at 5 inches x 6 1/4 inches – scored at 3 and 6 inches on the longer side.  On the first flap I punched out a 2 inch wide circle using my circles framelits.  the tag is cut using whisper white which I then stamped on the flower from the so very grateful set in stayzon.  Its coloured in with Melon Mambo inks and Old Olive.  You also stamp another version in stayzon on acetate window sheets – these are then tied together, and inserted into the magic pocket – made from a piece of whisper white glued just on the long sides et voila – One side of the tag (the acetate sits on top of the pocket and the coloured in tag sits underneath.

I found these instructions helpful to get the general idea from http://juliedavison.blogspot.co.uk/2009/10/magic-card-tutorial.html

The sentiment is also from the same stamp set – and SHOCK HORROR – it is NO LONGER available after 1st July so if you want it – clickitty click click the link below and order it before it disappears.

Hope you find this useful and are enjoying your weekend.  Pop back later in the week for another tutorial – this time on FAUX leather notebooks using the lovely Ex-Libris stamp set…

News, News, News

This weekend I attended Stampin’ Up! Regional day in Telford with around 350 other demos – it was such a fun event! We got presentations from other demonstrators, sneaky peeks at new products – and I cant wait to share them with you – and lots more.

I was very very shocked to hear my name called out and recognition for me and my team as a runner up in the newcomer award. I was completely gobsmacked and went very quiet – which if you know me – is very unusual! I won a lovely little spending spree which I shall be saving for the new catalogue launch – only a month away now wooo hooo!

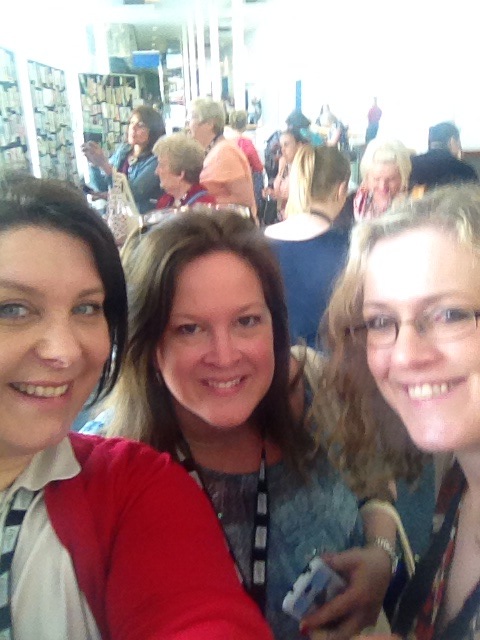
Here is a selfie of me with two of my downline – Sharon and Jo.

Me and Gang

We also got some lovely prizes as all attendee give-aways – free ribbon, ink pads and card in the new in colours so we can start preparing samples for our customers.

Here is a quick video of the swaps I got from Telford (and a sneaky peek in my craft room!)

Hope you are having a great week. I am really looking forward to my craft night on Thursday – its been too long since I saw my ladies.

If you would like to know more about how to join stampin’ up and get to come to events like this, earn free crafting supplies and enjoy a great discount, then this please fill in the contact form below to find out more information.

Wedding RSVP screen card and envelope

I teach wedding master classes where I sit for 3 hours or more with brides to show them how to make wedding invites, favours and much more.

I was delighted to receive an invitation from one such lovely bride and wanted to push the boat out with the RSVP – what do you think?

As I am in a generous mood if you want to know how I did this, leave me a comment and I will send you a link to the video tutorial for this card. Hope you are having a lovely weekend

20140516-090223.jpg

20140516-090230.jpg

20140516-090235.jpg

20140516-090243.jpg

20140516-090253.jpg

20140516-090259.jpg

Video Tutorial for Gift Card or Business Card Holders

As you read this I am meeting with around 350 other UK Stampin’ Up! Demonstrators at our Telford Meeting.

We have to make our own name badges – so here is mine


2014-05-10 17.37.35

The starburst saying set is just perfect for a name badge and I wonder how many other people will have used it!

We all make swaps – and here are mine – a little envelope punch board gift card holder – perfect for my business card and the instructions on how to make the envelope.

If you would like a quick video on how to make these gift card Holders – here you go

Pop back tomorrow and check out my facebook page to see what we have been up  to today and what Swaps I got in return 🙂

2014-05-10 17.40.38

Starburst Sayings Meets World Map

Just a quick one today  – a really simple card and gift tag made using the world map stamp, and the sentiments from Starburst sayings – stamped in Pacific Point on to whisper white card stock and then layered up on Real Red Circle and Basic Grey star burst.  Some ribbon completes the card or tag.  This one really pops off the page.  Hope you like it!

2014-05-10 17.37.09 2014-05-10 17.37.04

Tea Light Boxes with the Scallop Top Tag Punch

2014-05-11 17.55.43

These boxes for three tea light candles are made using the scallop tag topper punch


2014-05-11 17.55.55

So I have produced a video tutorial on how to make these cute little boxes


The measurements for the box that holds three candles is

Paper Size = 12 inches x 3 1/2 inches

Score with the long side at the top at 1 1/4,      5 3/4,        6 1/2,   and     10 3/4

Score with the short side at the top along at 3/4 on both sides


The measurements for the box that holds two candles is 

Paper size = 10 1/4 inches x 3 1/2 inches

Score with the long side at the top at 1 1/2,      4 3/4,        5 1/2,   and     8 3/4

Score with the short side at the top along at 3/4 on both sides


Decorate as you wish – I hope you enjoy making these boxes – you will need a scallop Tag Topper Punch – if you dont have one you can buy one here


Perfect Pennants & Petite Petals Gift Bags

2014-05-10 17.43.37This little gift bag is a protype for a bag I am making for my day job.  The charities is celebrating its 50th Anniversary and in June we have our anniversary Ball.  I have about 200 bags to make – like this but in Gold with our logo on them and a black bow.  I shall be making them with the help of some crafty colleagues and hope to blog about that later.


The bag is made using the free DSP from Saleabration – its such a lovely print I hope they use it again somehwere.  The whisper white cardstock tag is made with the scallop top tag punch and the sentiment is from the perfect pennants set, stamped in Night of Navy.  I punched the flowers out of night of navy card stock using the petite petal punch, a few diamonds, a little silver glimmer paper and some satin ribbon and we are good to go!


Sending good thoughts your way too.. I am on the count down to Telford – the one a year meeting of around 350 UK Stampin’ Up! demonstrators – swapping crafty ideas, tips and swaps.. Check back in the week for my swaps and name badge post – and then after the event for some fun round ups of what we got up to!

Card with A Clasp Peaceful Petals & Morning Meadow

When I saw this card from Brandy  I knew I wanted to have a go.

I didnt have the same stamp sets, but it was easy to switch them out with Peaceful Petals and Morning Meadow.

I used Wisteria wonder and Soft Suede as my card & ink colours – I love the way its turned out and it was so quick and easy to make.  Watch the video to see – although warning – there are spoilers there about the new catalogue – the US get their new catalogue a whole month before us – so lovelies in Europe you will have to wait till 1st July to see the card she is referring to!


2014-05-10 21.36.16

Less is More – One Layer Thank You

I love the Less is More Blog – it always has such a great load of people contributing to it each week, and if ever I am stuck for an idea or Mr Mojo has taken a hike I find something there to get me back at my craft table creating.

This week’s challenge is one layer thank you cards

I really love the Stippled Blossoms set from Stampin Up! and I usually use it for fairly complex fussy cards with lots and lots of layers, ribbons and dimensions, so I thought it would be fun to try and use the set as a one layer

I started with a Naturals White card base  and masked off an area using post it notes – like this


2014-05-10 17.11.16


Then using Wisteria Wonder and Elegant Eggplant as my two colours for the flowers and Wild Wasabi and Garden Green as the two colours for the leaves I started stamping flowers randomly on and off the masked layers.

I then used the Thank You sentiment from the Happy Watercolour set in Black Stayzon – and then took my Marker pens in Elegant Egg Plant and Wild Wasabi and drew two parallel lines down the card to finish off and create the illusion of a layer.

2014-05-10 17.42.08

I am slightly just a little bit sad that this stamp set is on the Retired List and will only be available until the end of June, but hey ho – I have my set and will cherish it for many years to come as its so pretty – and now I have proved that I can do simple one layer cards or vintage over the top fussy ones with it!


Petite Petal Punch – Still on Backorder

20140123-001925.jpg

It’s cards like this one that have caused the Petite Petal Punch to be so popular WORLDWIDE that Stampin Up! have had a serious backorder problem with them for the past 3 months – as soon as they get some in, they sell out again.  I appreciate it has been a very frustrating time for some of my ladies who are still waiting on orders from March and April.

I can only apologize that its taken so long, and reassure you that everyone is doing their best to get more manufactured as quickly as possible and back in the warehouse in Frankfurt so that they can be sent to you.

I think I have spoken to everyone who is patiently waiting and I can only reassure you that we are doing all we can

Grab em while they are STILL HERE!

Very soon we will be getting the retired list of stamps for the UK, hopefully by the end of the month.

I am having a RETIREMENT PARTY – We will be making 4 projects with some of the retiring stamps, cardstocks and designer scrapbook paper and any of my local customers and friends are invited!.  The Party is outside of my usual class schedule – so to come just email me on mrscarolinehallett@gmail.com.  Details Are below


When:- Thursday 22nd May 2014
Time: 7pm-9pm
Where:  CraftyHallett HQ – Folkestone
Cost – FREE but there are only 8 spaces so book to make sure you can come play…..

In the meantime – a little bird tells me that the retiring in colour sets are always the first things to sell out – so if you want any of these you had better order now rather than be disappointed – as once they are gone, they are gone.

In Colours


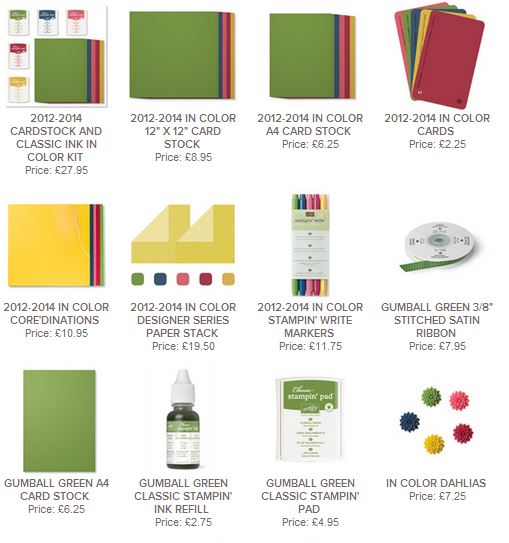
I have stocked up on the Ink Refill so I know my ink pad will be good to go for some time yet.  I am also adding the in colour coredinations 12 x 12 sheets as they work out so reasonable.

Click on the picture to buy


Spiral Spins for Making A Point to Have a Party!

2014-05-05 19.35.58

Whilst I was visiting Brian’s website yesterday I spied this rather marvellous card… 

I have had the Making a Point stamp set for months and never once got it inky (its one of the seasonal Occasions Hostess Sets) – so this was a perfect card to get at least one of them out of the box before we have to say good bye to them.  The Spiral Spins are lovely stamped in Tempting Turquoise, Pumpkin Pie and Melon Mambo and they just POPpitty POP POP off the page.

If you want the Making a Point Stamp Set you will have to be quick – we only have until 30th June before it retires – so GET IN TOUCH if you would like to host a party – and this set could be yours for FREE – just fill in the form at the end of this post

Making a point