Christmas place settings

On Wednesday I cooked Christmas lunch for our staff team from the day job. 16 hungry mouths waiting for Turkey and all the trimmings.

It was time for crafty Hallett to turn into Chefy Hallett – which was one of my jobs in a previous life, so all good fun, but I couldn’t resist a little crafty Hallett creeping in …..

IMG_0188.JPG

I printed the names off on the computer and then mounted them on a small tent fold of green card after I had made little tags of them using the scallop tag topper punch (still my fave from last years catalogue) and then a little twine and a jingle bell and we were good to go.

And the team were happy with the food – I did the main course and my colleague Jo did the desserts yum yum

IMG_0514.JPG

IMG_0515.JPG

IMG_0513.JPG

It’s A Stampin’ Up! Crafty Hallett Christmas Week – Day 7

So here we are the last day of my week long Christmas extravaganza.  Thank you for visiting and without further ado we have this little card

2014-11-30 12.19.14

The stars were stamped with versamark and gold embossing powder using the Bright & Beautiful stamp set.  And the little gold glitter backed slot hides the mechanism for the Star to spin as you move the card from side to side.  I made this card at my last Card Class.  The ladies had fun sticking dimensional dots to their 2ps and getting their cards to slide.

Check back tomorrow for a special project I made for other demos to make at my crafty weekend away – photos and a downloadable tutorial for you to make your own too!


Take care

Caroline xx

It’s A Stampin’ Up! Crafty Hallett Christmas Week – Day 2

Hi there – welcome to Day 2, this time I wanted to show you a quick gift idea for colleagues at work, or school teachers.  Some humbugs in a jar with a great sentiment.  A little satin seambinding ribbon and some twine and we are good to go – great for quick and easy makes.

Sadly the Bah Humbug sentiment is retired… but it was so perfect for this gift I had to use it!  The jars are from IKEA and the sweeties from Sainsbury – dont you just love that Champagne glimmer paper – just a little sparkle

2014-11-30 12.15.47


Today is the last day you can sign up as a demonstrator for just £74.25 and get £130 worth of goodies.  Dont forget to do it by 10pm if you want to take advantage of the offer – just click to visit this page to get the link to join up.

Please check back tomorrow for Day 3 of my Christmas Crafty Week!

Thanks for visiting.


Caroline


It’s A CraftyHallett Stampin’ Up Christmas Week – Day 1

Follow my blog with Bloglovin

Every day this week I will be blogging a Christmas Card, packaging, gift or decoration idea.  So lets stop waffling and start with today’s project. 2014-11-30 12.14.05 This is a snowflake sparkle card.  The card, using only one Stampin’ Up! Colour – Island Indigo, has been cut using the Snowflake Card Thinlets Die and stamped with images from the LetterPress Winter Stamp Set and a sentiment from the Good Greetings set.  A couple of snowflakes are cut from Silver Glimmer Paper and a little DSP is from the All Is Calm Speciality Paper Set. There is a video from Stampin’ Up here which shows you how to use the die and to use the die to cut the snowflakes http://youtu.be/feQESSKQnfw Everything you need to create this card is listed below – click on the pictures to be taken automagically to my shop so you can check them out for yourself.  Hope you have a great week and please pop back tomorrow for another project. PS. Big Reminder:-  You only have one more day to take advantage of the great starter kit offer – pay £74.25 and get £130 worth of product – a fantastic christmas present to you from Stampin’ Up!  Click here for more details 

Christmas Treat Boxes from Stampin’ Up!

Christmas BoxWe bought these really cute Chocolate Christmas Lollypops in Bruges this weekend and I wanted to make a box for them.  I measured the lolly to be 6 cm x 18 cms and worked out a box around it.  The original idea for this concept of a box book wrapper came from a lovely fellow Pinkie Demo called Suzanne – you can see her version here on her blog http://moonsongdesigns.wordpress.com/2014/11/09/a-little-gift/ if you wanted to make a little one.

There is a video here to show you how to make them.

The box base is made from a piece of card 12 cm x 23 cm and the wrapper is 16cm x 17.5 cm.  The Designer Scrap Book Paper wrapper is 15.5cm x 17 cm.  The lining piece is 17cm x 6cm.

The wrapper is scored at 7cm and 9cm with the short side at the top.  The box base is scored at 1.5 cm and 3 cm on all four sides.

Have fun making them.  I will be making some of these for my colleagues at work.

Advent Calendar Part 2 – Using Stampin’ Up UK’s 25 Days Set

Hope you like yesterdays advent calendar?  Just 21 days until we start counting down to the big man’s arrival.

Todays advent calendar is a little present for my head office colleagues – something for everyone to enjoy – one box at a time, filled with a little chocolate loveliness – so here are days 1-5 – a little cube, a shopping bag, a milk style pouch, another bag, and a triangle

IMG_0616

Next up we have days 6-10 -some more of those pouches, and two crackers made on the Envelope Punch board

IMG_0621

For days 11-15 I used the petite handbag die, the curvy keep sake die and one of the stars from the Many Merry Stars kit 🙂

IMG_0623

Days 16-20 are meant to look like shopping bags and boxes, as that time of the year approaches

IMG_0626

And finally the last five

IMG_0630

Just had to make number 25 glittering gold glimmer paper.

I have put some pictures of the products used below if you want to get some from my shop, but WARNING, I used everything I could find on this set…

Advent Calendar using Stampin’ Up! UK’s Nifty little Boxes

Stampin up have brought out a great set of little boxes and a stamp set to make this cool advent calendar.

2014-11-08 18.44.03

The boxes fold flat and need no glue to keep them closed.  The box is a 2 inch cube so perfect for your own chocolates or perhaps a poem or a riddle?  I punched the circles out from Pear Pizazz and Soft Sky cardstock and then stamped them using the 25 Days Stamp set.  Such a versatile set that is not just for christmas advent calendars – oh no this is the set that just keeps on giving.  How about using this set for

Thank you gifts, first day of school photos, birthday cards, border & backgrounds, labels, graduation cards, party favours, 25 reasons why you love your other half, anniversary cards and gifts, countdowns to a wedding, list of your favourite things, project life and scrapbooking, check lists, banners, clue for a treasure hunts and so much more…

IMG_0640

The boxes are just £6.25 for 25 – click on the pictures below to buy them automagically from my shop.  Such good value even if you didnt want to make an advent calendar with them, perhaps gifts for the table on christmas day, or just little treat boxes.

Come back tomorrow to see the “alternative” advent calendar I have made using the same stamp set but some different ideas for boxes.

Lots of love

Crafty Hallett

Stampin’ Up! UK’s Many Merry Stars Kit – opening the bag

Merry and Bright

So when Pam Morgan demonstrated these kits at convention and I saw the size of the big star I just knew I needed this kit!  And what’s more I knew I wanted to make them with my crafty gals.

Its been a long week waiting for Mr UPS to deliver them, so when I got in from work this evening I couldn’t wait to get started.  I thought I would video this occasion so you could share the excitement with me!  Have you got your kit yet – at £23.99 they are great value and you get a LOT.

Video is here

you will have to excuse the bloopers, I was learning as I went along, and as we are off at a fabulous wedding all day tomorrow I could not wait for better light – so its not ideal but its there 🙂

Just got 25 more stars to go – which is perfect for an Advent calendar so I shall be filing mine with treats for each day leading up to the BIG star for the final day.

If you want one of these for yourself then please visit my webshop – and hurry as these are only available whilst stocks last – and they are very popular already, why not get a couple they make great presents for keeping the kids busy in the run up to Christmas – as another idea perhaps make them with the kids pictures or wishes inside, seal them up and then use them as decorations for the next few years – then when the kids are grown up open the stars and read what their 5/6/10 year old selves were excited about!  Or if you do craft fairs buy some to sell

Hope you all have a lovely weekend.   Oh and 1 week on I still havent come out of my SU Convention bubble… and I am planning my next one 🙂

All I Want for Christmas is you… and a few other things too!

Blog hop logoThank you for joining us on another Pinkies Blog Hop! We’re showcasing lots of gorgeous projects using products from the new Stampin’ Up!® Autumn/Winter Seasonal Catalogue. Simply use the buttons at the end of each post to keep hopping!

If you arrived here from Lucy’s blog and you haven’t been to my blog before then Willkommen, Bienvenue, and Welcome!

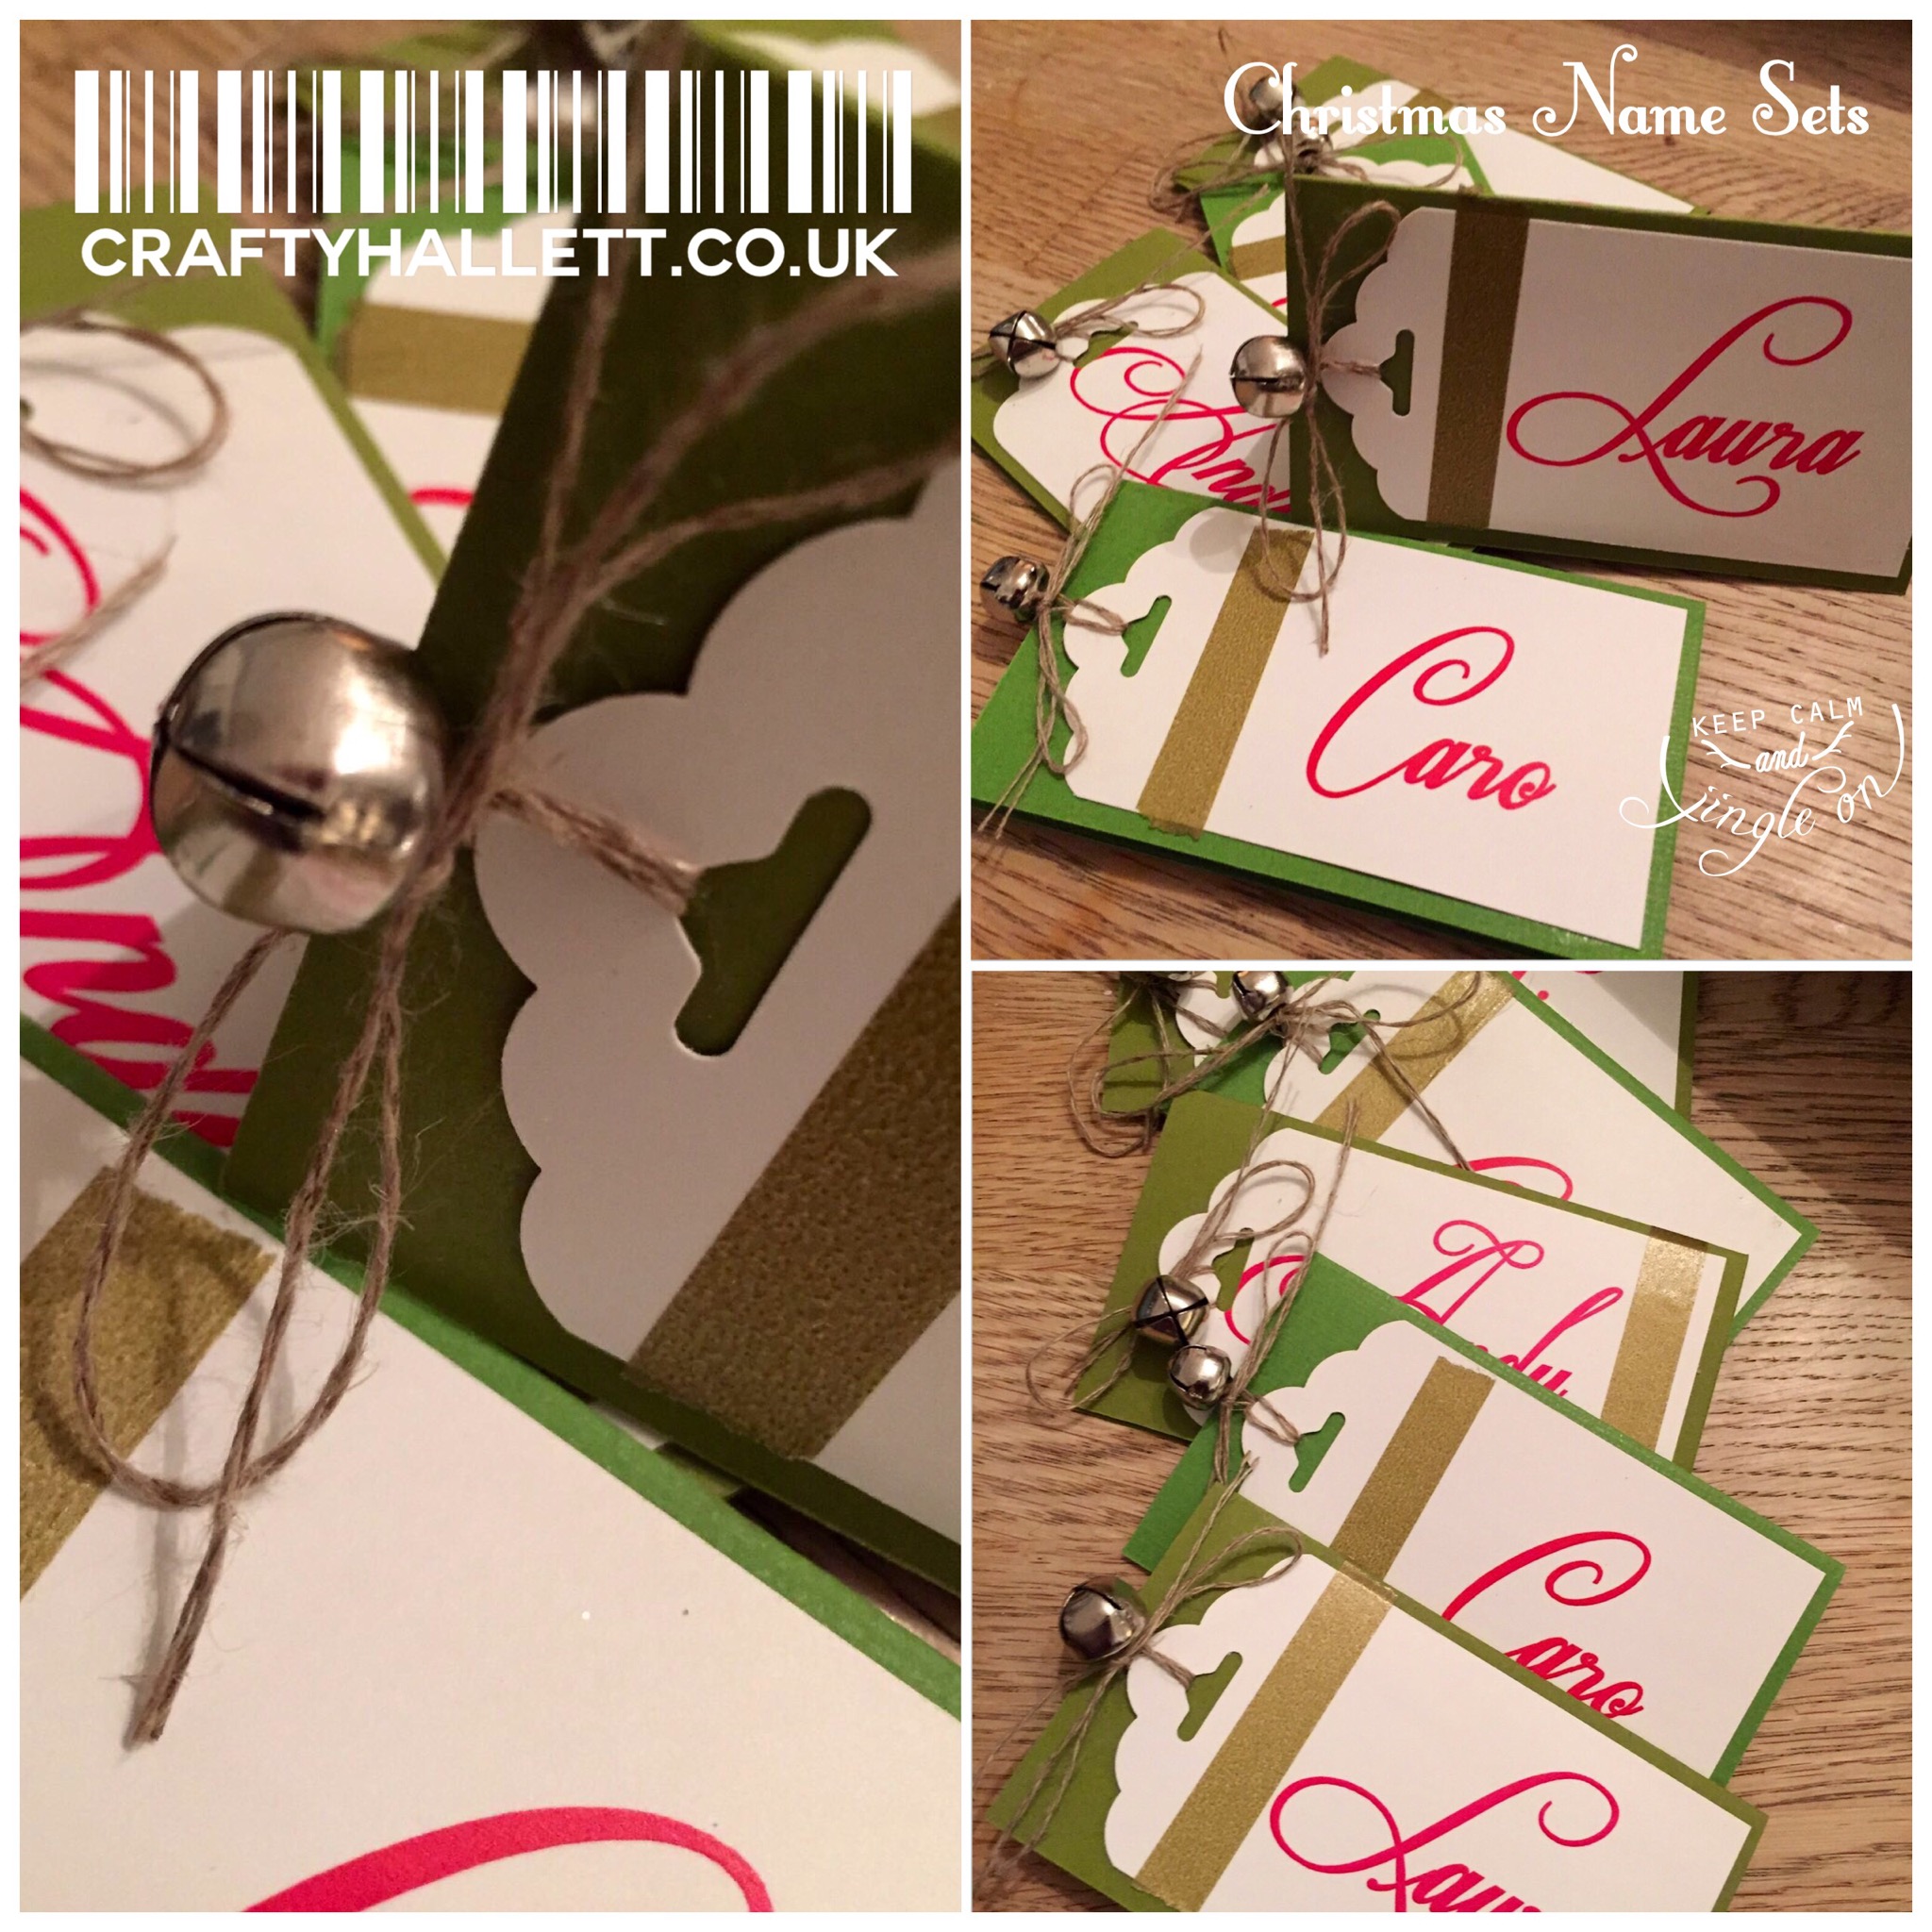
So remember the song – “he’s making a list and checking it twice?”… I am sure you have all been nice as the new Autumn/Winter seasonal catalogue is here and I hope you get all you are wishing for from it!  It’s cram packed full of project ideas, so it’s a bit overwhelming at first, but as soon as I saw the Christmas Messages stamp set I knew I needed the 9 sentiments that were in there – so useful for presents, tags and cards year after year.  The one that made me laugh the most was “All I want for Christmas is You”… and its pair “and a few other things but mostly you” .  This is how conversations with my darling hubby always start each year around present giving time… he says all he needs/wants is me.. and then starts dropping big hints about new carbon frame bikes and wheels and all sorts of non-stampin up non-essential expenditure.

I thought it would be fun to make this card – a standard Christmas card, using the new Festive Flurry Stamp and Framlits Bundle, I stamped the largest snowflake in versamark and embossed in white, and layered it up with the medium stamped in Baked Brown Sugar, and then the smallest one stamped with white on velum.  The sentiment is from the Wishing You set.

photo 1

Inside is the All I Want for Christmas Sentiment – with the coolest thing ever – I cut the card base at 12 inches x 6 inches and then scored at 4.5 inches and then using the new Stamping Up Trimmer Rotary Attachment and the Perforations cutting blade I perforated the remaining piece at 9 inches to create a tear off portion.

photo 2

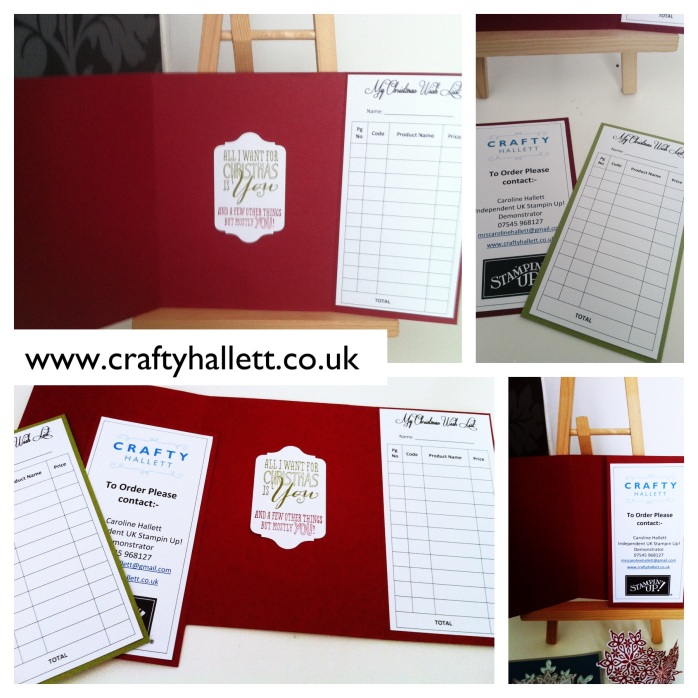
On the tear off portion there is a wish list I made on the computer and printed out.  This is for my lovely customers to fill in and then either return to me, or give to their other halves/friends so they can get in touch with me  and I can do the necessary.

I shall be making a stack of these and giving them to my lovely ladies in November so they have plenty of time to think about what they would like… but of course Darling Hubby Dan if you are reading this – I am a stamping up demonstrator and I can earn all these goodies for myself, so all I do want is you.

And if you are looking to recreate this for yourself – here are the products I used to start you off on your wish list.

Cherry Cobber & Old Olive Textured Cardstock, Whisper White Cardstock, Velum, Gold Foil Sheet,  White embossing powder, Cherry Cobbler, Baked Brown Sugar & Old Olive Ink pads, Wishing You & Christmas Messages Stamp set, Festive Flurry Stamps & Framelits – ask your demo about getting these in a bundle and save 15%, The stampin up rotary add on is great – I have a video for it on my you tube channel, and the perforating blade is only £3.75.  These items are available from my on line shop – click the link to the right – or order with your own local friendly stampin up demo.

So thank you for reading, the next blog is  from the lovely Jenny McCormac  why not pop over and see what she has been up to – I cant wait to see all the inspirational ideas…

Blog hop next

Blog hop previous

The Seasonal catalogue is live today

Good news – the stampin up seasonal catalogue is launching in the UK today. I have prepared a video for you that takes you through the catalogue and shows you my samples and ideas that I have been inspired by from the new products

You can look at the book online here

br />
20130828-183939.jpg

You can see these live and get to play with the new products if you come to my open house this Saturday 31st August from 1-3pm – book in with me here – it’s free 🙂 http://craftyhallettevents.eventbrite.co.uk/

If you would like a copy of the catalogue please get in touch – use the comment form or send me an email 🙂

My open house on Saturday and a hostess event on Sunday will be the first time I am using these products with customers so can’t wait to see what everyone thinks of them – what’s your favourite thing in the new book.?<

Tim Holtz style configurations box for xmas

So. Whilst eagerly awaiting picket fence distress stain, Kraft resist Christmas paper and a pine cone die to be delivered from the Internet (and then I can crack on with the rest of the Christmas tags!) I thought I would add to my collection of configuration boxes – look back on this blog and you will see the one I did for the wedding keepsakes and the one I did with Jenny Boxall for Valentines.

This is my Christmas themed one, with lots of family keep sakes I really love the little stockings with all the children’s names on them, and the little angel on the tree is a very old Christmas decoration that is getting too fragile to hang up on the tree anymore. I put the lights round (they are battery powered and a bargain only £1 from Ikea. I painted the outside with red distress stains and the rubbed a little gold acrylic paint over the Top to make it sparkle – lots of other little bits including the wish sign inspired by something Tim Holtz did this week with the 12 tags of Christmas, hop over to his blog here

So here are the pickies – hope you like

20111209-232249.jpg

20111209-232305.jpg

20111209-232314.jpg

20111209-232333.jpg

Christmas card

So seeing the first tag of Christmas in Tim Holtz blog made me panic – 1st December and I haven’t made a single Christmas card this year – why did I not start earlier

Here is one I knocked up using the darkroom door Christmas word block stamp and an idea in Stamper magazine – quick simple and off the shoulder – this might be the only one I make at the rate the time is slipping away – so enjoy!!!

Off to try Lord Tim of Holtz tag no 1 now

20111201-205830.jpg